Astronomy is a business that is starved of light, inluding the field of astrophotography. To compensate for this we use long exposures, many of them in fact, which are later combined using cleaver statistical methods for minimizing noise. However, very often practical matters of the real world intervene to prevent us from obtaining the very long or very large number of exposures required for creating a low noise image. One way around this could be to try again later, waiting sometimes months and years for the right moment. This is always the best method, provided the target field hasn't changed, but it is also a bit discouraging. Here I describe a simple image processing method for making the most of your limited data. I shall not take credit for inventing it; it is in fact practiced by many and several software packages also include elements of it.
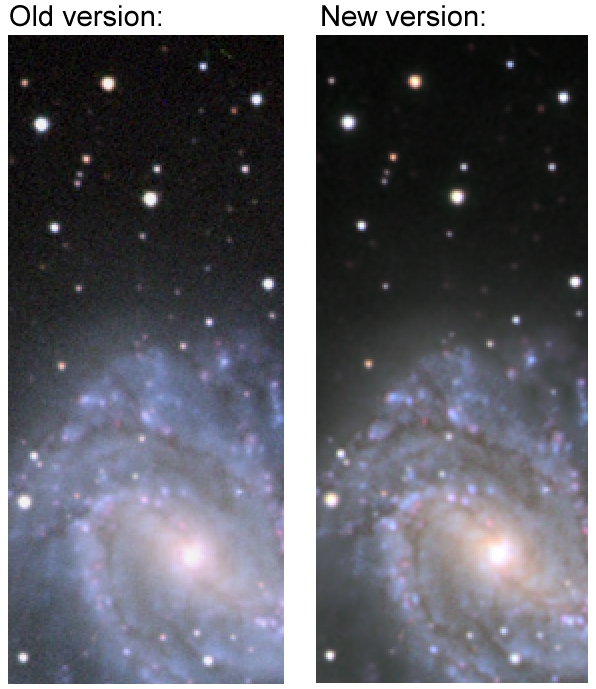
While imaging the face-on galaxy M83 from Australia I got clouded out after only two 600 second exposures through a clear (luminance) filter. Normally, I'd prefer to have ten times that to make a good, low-noise image. Doing my best with standard processing methods I made an LLRGB image based on my two luminance frames and some RGB data from a friend. A close-up is shown above at left; this image is noisy!
The noise is naturally largest in the faint regions. Using Photoshop CS I make two copies of the image. On one I do my best to reduce the noise (with a Photoshop plug-in 'Grain Surgery' followed by a despeckle), the price of this noise elimination is a reduced resolution. On the other copy I use the Magic Wand tool (tolerance around 100) to select the brightest (low noise) regions of the image, see examples below:
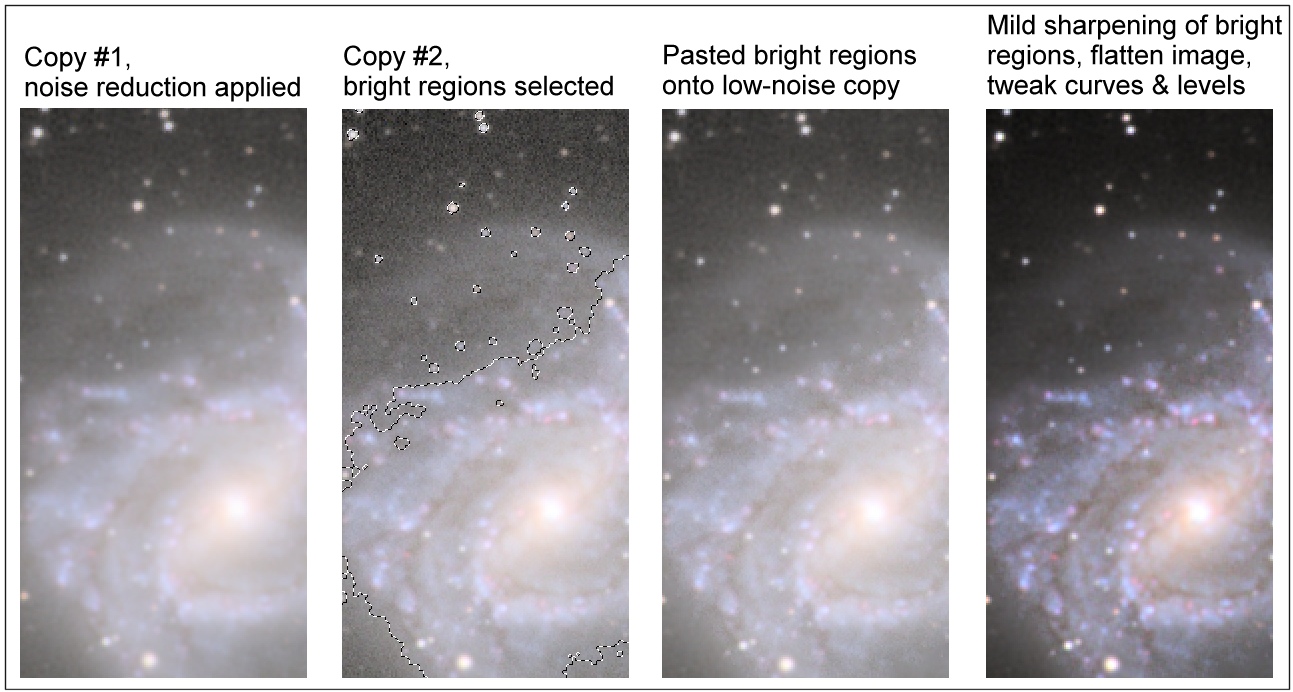
The bright selection is then pasted as a new layer onto the low-noise copy, hence a 'selective' noise reduction has been applied to the low light levels of the image. If the image can bear it the bright region layer can then be sharpened slightly. Finally the image is flattened and curves/levels are applied to achieve a pleasing level of contrast and background brightness.
On the comparison images at the top of this page you can see the improvement provided by this method. The main idea is just to be selective about where to apply noise reduction and where to sharpen. Many programs can do this automatically, but I prefer the manual method for tight control of the end-result.
Oh, yeah - I forgot to mention that on the improved image I also have applied
a trick from Russell Croman for improving
star appearances. Look closely and you'll see that the stars on the improved image are slightly smaller, appear less 'hard' and have more
vivid colors than before. Thanks, Russ!
Here's my main page where you can see more of the pictures I have taken so far.
Comments greatly appreciated! (mikael@leif.org)